Installation with Treon Bolt Mount Adapter
For the best measurement quality, mount directly to the surface. Use it on a flat area at least 31.7 mm (1.25 in) across, with a tapped M6 or M8 hole, when you do not need to align the axes.
Specifications
| Parameter | Value |
|---|---|
| Bonding | M6×1 or M8×1.25 bolt |
| Minimum mounting surface diameter | 31.7 mm (1.25 in) |
| Minimum thread hole depth | 9 mm (0.35 in) |
| Total height (node + adapter) | 88 mm (3.46 in) |
| Curved surface | No |
| Uneven surface | No |
| Allows manual orientation | No |
| Frequency response (vibration) | Excellent |
| Temperature response (steady-state) | Good |
| Fast temperature change response | Good |
| Affects magnetometer measurements | No |
What you need
- A Treon Industrial Node X.
- A Treon Bolt Mount Adapter.
- A tap and drill for an M6×1 or M8×1.25 bolt hole, minimum 9 mm (0.35 in) thread depth.
- A 36 mm (1.42 in) spanner and a 34 mm (1.34 in) spanner.
- A torque wrench capable of 20 Nm.
- Cleaning materials: degreaser or isopropyl alcohol, lint-free wipes.
- Personal protective equipment as per site rules.
Safety and preparation
- Isolate or switch off the asset, and any equipment close to it, if your site procedures require it.
- Choose a flat, smooth area larger than the sensor base, close to the measurement point and away from resonant or loose parts.
- Clean the surface thoroughly. Remove paint, rust, oil and debris.
- Check that the asset's material is thick enough for the tapped hole.
Step by step
1. Drill the mounting hole
Drill an M6×1 or M8×1.25 hole into the machine surface at the location you have chosen. Think carefully about where you drill, and consult the machine's manual or its manufacturer if you are unsure.
Drill the hole perpendicular (90°) to the surface. The minimum thread depth is 9 mm (0.35 in).
2. Clean the surface
Clean the machine surface thoroughly after drilling.
3. Attach the mounting bolt to the adapter
Screw the mounting bolt into the Treon Bolt Mount Adapter. Use the M6×1 bolt if you drilled an M6 hole, the M8×1.25 bolt if you drilled an M8 hole.
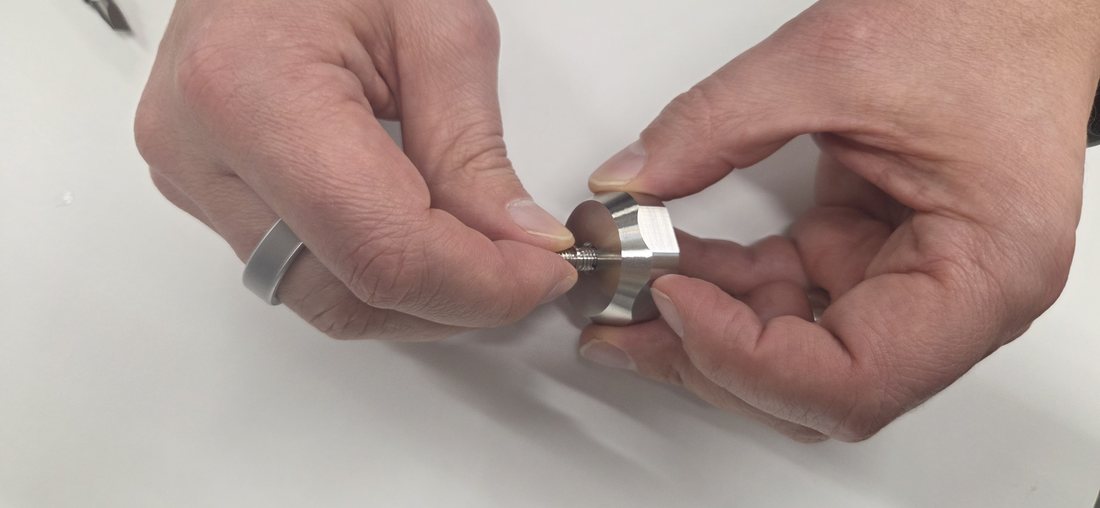
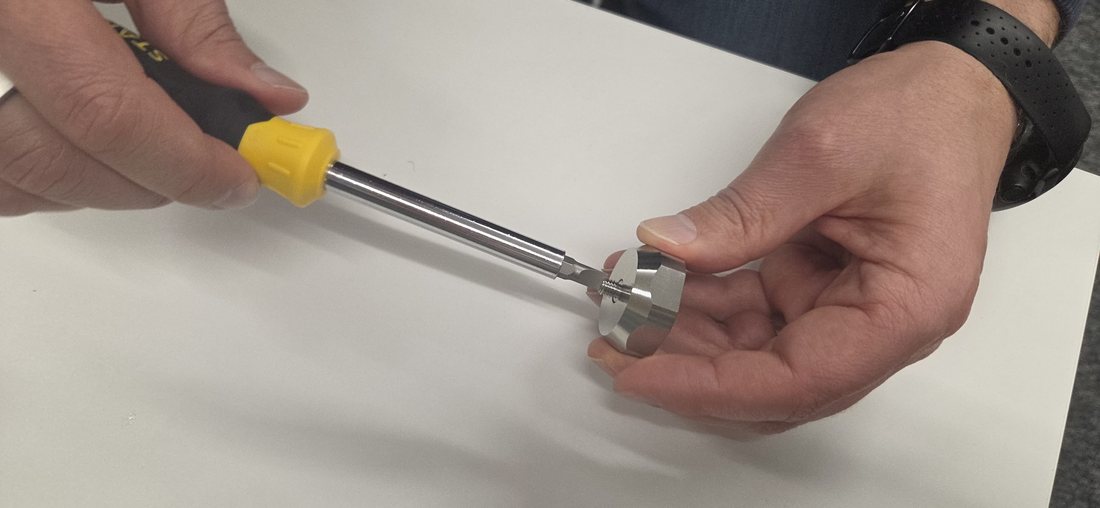
4. Tighten the adapter onto the node
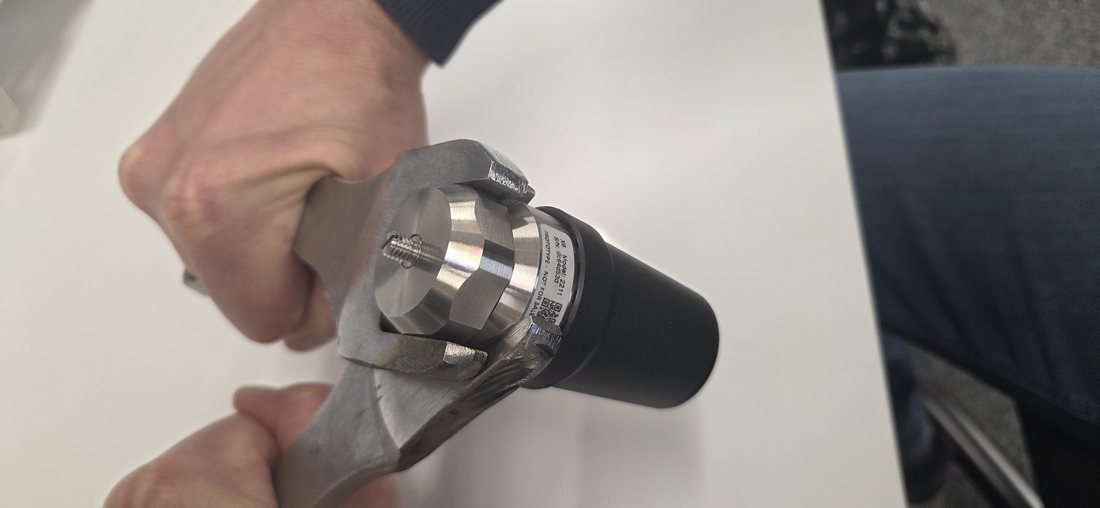
Place the adapter, with its bolt fitted, onto the Treon Industrial Node X and screw it on.
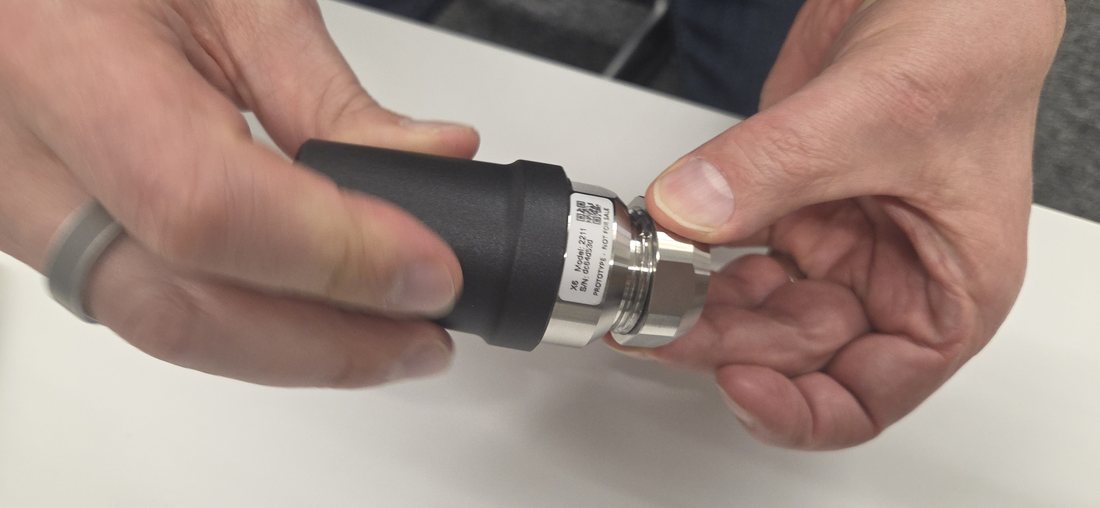
Tighten this joint to approximately 20 Nm. Hold the node still with a 36 mm (1.42 in) spanner on the Node X base while you turn and tighten the adapter with a 34 mm (1.34 in) spanner.
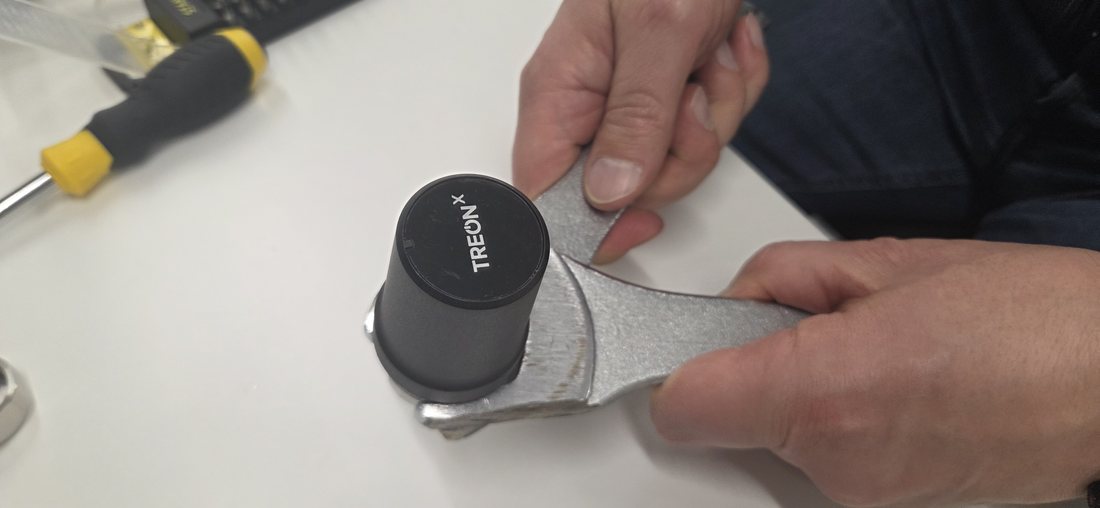
5. Attach the assembly to the machine
Screw the node, with the adapter fitted, into the M6 or M8 hole in the asset's surface. You can use a threadlocker if the installation needs it.
6. Tighten onto the asset
Tighten the adapter-to-asset joint to 4 Nm.
Verify
- Confirm the axis alignment marks match the directions you intended.
- Run a quick measurement and check the directional sensitivity is what you expect.
The Treon Industrial Node X is now installed.
Disclaimer
Treon is not responsible for any damage, injury, or malfunction resulting from the installation or use of the Treon Industrial Node X. Installation must be performed by qualified personnel. Any issues arising from incorrect installation, improper handling, or use outside the specified guidelines are the sole responsibility of the installer or end user.