Mounting
Built for rapid installation. Glue the Node C to the machine, then commission it with the mobile app over NFC. This page covers the gluing.
Before you start
When installing sensors, review and comply with all relevant safety regulations — you are solely responsible for the safe installation of the sensor on any equipment or machine component. Mounting requires an industrial adhesive: always follow the safety and handling guidelines provided by the adhesive manufacturer.
The contact area
The temperature and vibration sensors are at the base of the device. Any part of the base can serve as a contact point, but for accurate readings the contact area should be at least 30 × 25 mm, and centred over the mounting location. At minimum, one third of the base must be bonded to the asset.
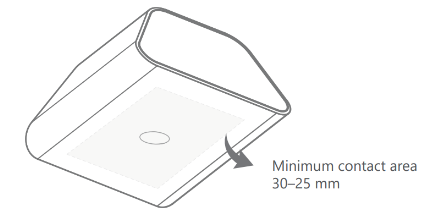
For best measurement quality, glue the sensor to a completely flat and smooth surface larger than the base of the sensor.
Adhesives
Use a cyanoacrylate-based industrial adhesive:
| Surface | Adhesive | Layer |
|---|---|---|
| Flat and smooth | Loctite 454 | Thin |
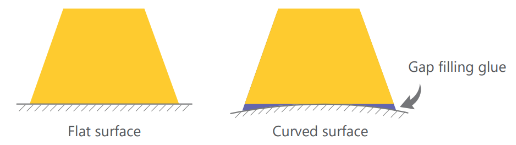
| Curved or uneven | Loctite 3090 or Loctite 4070 | Slightly thicker, gap-filling |
A gap-filling adhesive can bridge distances of up to about 5 mm between the surface and the sensor. Follow the instructions that come with the adhesive closely, and see its technical information sheet for cure times.
Step by step
- Prepare the surface. Thoroughly remove all oil, grease and debris from the spot where the sensor will be installed.
- Apply the adhesive to the bottom of the sensor, maximising the area that will be in contact with the asset. Use a thin layer of Loctite 454 on a flat, relatively smooth surface, or a more liberal layer of Loctite 3090 or 4070 on a rounded or somewhat uneven one.
- Hold the sensor against the mounting location for 30 seconds, pressing firmly. On a curved surface, add a small amount of extra adhesive at each side for better contact.
- Check the result. The sensor is bonded and ready for use.
Alignment
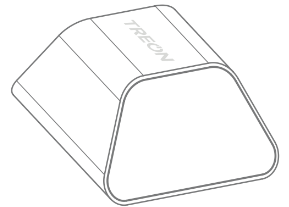
The Treon Industrial Node C measures three axes — X, Y, Z, marked on the body — and how you orient it matters. For the most accurate interpretation of the measurement data, align it like this:
- One sensor axis along the shaft of the machine. This is the axial direction.
- One axis in the horizontal direction.
- One axis in the vertical direction.
Carefully plan the alignment of the sensor before mounting it to the asset. Do not move or adjust the sensor after it has been pressed into place, to allow the glue to cure properly.
Aligning every sensor on a machine, and across similar machines, the same way is what makes per-axis readings comparable between measurement points.
See Recommended installation locations for which directions to measure in.
Next
Once it is bonded, commission it with the mobile app to power it on and attach it to an asset. It will not send data immediately — commissioning starts its measurement cycle, and it can take a few cycles before the first data reaches Treon Connect. That is a one-time delay while the sensor settles, not its ongoing reporting interval.