Treon Gateway In Protective Enclosure - Unpacking & Installation
What’s in the box
The sales box of the Treon Gateway in Protective Enclosure contains the following:
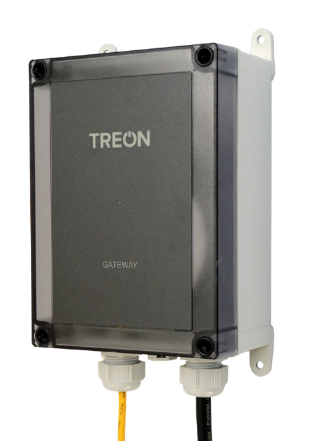
- Treon Gateway in Protective Enclosure
- Documentation
Here is a video showing the unboxing of the Treon Condition Monitoring Starter Kit with a Treon Gateway In Protected Enclosure and Treon Industrial Nodes 6:
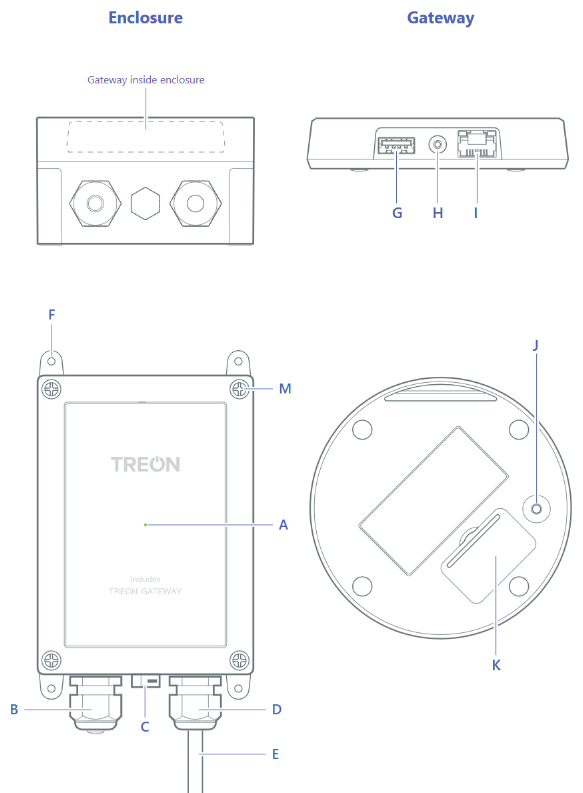
Keys and parts
A. Status light
B. Ethernet cable gland
C. Air vent
D. Power cable gland
E. Power cable
F. Adjustable mounting brackets
G. USB A host port
H. Power cable connector
I. Ethernet cable connector
J. Micro SIM card slot
K. Configuration button
L. Finger guard for power cable (see image in step 1)
M. Lid screws
Important note: Pressing the Configuration button on the bottom of the Treon Gateway for longer will lead to a ‘factory reset’. This will not reset the gateway to the original configuration you received it in, but it will delete all of the user-specific data. The factory reset is intended to delete all data at the gateway’s end-of-life so it can be disposed of securely. Read more here.
Open the enclosure
Unplug the Treon Gateway in Protective Enclosure’s power cable from the wall outlet.
Unscrew the four screws (M) at the corners of the protective enclosure lid with a suitable screwdriver tool.
Open the lid carefully. Avoid bending the cable too much as it may damage the Device.
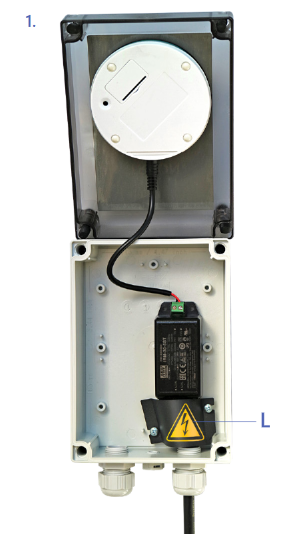
Please note: Always unplug the Treon Gateway’s power cable from the wall outlet before opening the enclosure. Do not remove the finger guard of the power cable (L) as this may result in electric shock.
Connect to the internet via Ethernet cable
You can connect the gateway to the internet with an Ethernet cable connection, a cellular connection, or a Wi-Fi connection. Note that the Ethernet and cellular connections automatically override the wi-fi connection.
Use an ethernet cable connection
Open the protective enclosure lid as described previously.
Screw open the Ethernet cable gland cap (B). Remove the sealing rubber (B1) and plug (B2) by pushing from inside out.
Pull the RJ45 cable through cable gland cap and install rubber sealing around cable. Push the rubber sealing inside RJ45 cable gland.
Attach the Ethernet cable to RJ45 connector (I).
Adjust the Ethernet cable length to appropriate length and tighten the RJ45 cable gland cap.
Close the lid and tighten the screws.

Power up the Treon Gateway in Protective Enclosure
Make sure that the power cable is attached to the gateway (H) and close the protective enclosure lid. Plug the gateway in a wall outlet. The gateway switches on automatically. Use only the power supply unit provided together with the product.
The status light (A) can show different colours:
Green light The gateway is connected to the internet
Blue light The gateway is trying to establish a connection to the internet.
Blinking blue The gateway is in configuration mode
Red light There’s an error with the gateway or it has no internet connection. Open the configuration mode to see what’s wrong.
Configuring the Treon Gateway in Protective Enclosure
For configuring the Treon Gateway in Protective Enclosure, you need to open the protective enclosure lid as described in the first step. Plug the gateway back in a wall outlet so it has power.
Press the configuration button (K) until the status light (A) starts blinking. The gateway now becomes a wi-fi access point
Using your phone, computer, or tablet, connect to the access point: select treongw1-serialnumber, where serialnumber is the serial number of your Treon Gateway.
Enter your password. It has been provided separately with the gateway.
Windows 10 may ask for a pin code as a primary access point password. Please use the “password” option instead. Remember to change the password later.
Open a browser on your phone, computer or tablet and go to the address 192.168.0.1
Perform all needed configurations. You can, for example, change the gateway access point password, check the error log, and set up a wi-fi network connection.
To exit configuration mode, select Quit, or press and hold the configuration button (K) until the status light stops blinking.
When all needed configurations are done, close the protective enclosure lid again and tighten the screws.
Mounting the Treon Gateway in Protective Enclosure
Turn the four adjustable mounting brackets (F) outwards.
Attach the enclosure to the surface with four screws (diameter maximum 4mm). The screws are not included in the product package.
Ensure that the mains power plug is easily accessible.

Last updated on Jan 28, 2025