Treon Gateway Configuration UI 2.2.7
Introduction
The Configuration UI is the graphical user interface (GUI) for setting up the Treon Gateway, Treon Gateway 2 and Treon Gateway in Protective Enclosure. This article explains Configuration UI version 2.2.7 as included in Treon Aito Release 7.2 for Gateway.
Access Point Mode
To configure the Treon Gateway via the Configuration UI, you need to first turn the Treon Gateway into Access Point Mode and connect to it via a browser.
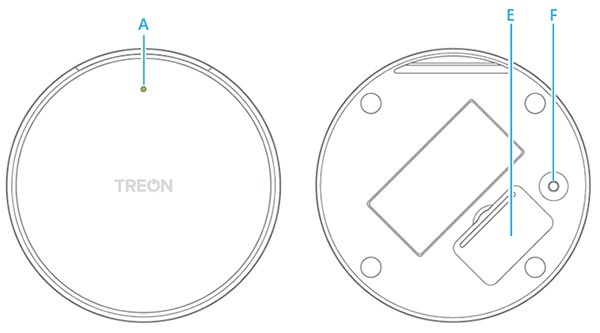
Turn on the Treon Gateway and wait approximately 10 minutes until the status light (A) turns from blue to green (connected) or red (not connected) to indicate that the gateway has fully booted.
Press the configuration button (F) on the bottom of the gateway about 10 seconds until the status light (A) starts blinking. The gateway now becomes a Wi-Fi access point. (Please do not press the button for a full minute, as this will delete the data on the gateway.)
Using your phone, computer, or tablet, connect to the access point: select the Wi-Fi network treongw1-serialnumber, where serialnumber is the serial number of your gateway.
Enter your password. It has been provided separately with the Treon Gateway.
Please Note: After selecting the correct Wi-Fi network, Windows 10 and Windows 11 may ask for a pin code as a primary access point password. Please use the “Connect using a Security key instead” option instead so you can enter the password. Remember to change the Wi-Fi password later.Open a browser on your phone, computer or tablet and go to address 192.168.0.1 in order to access the Configuration UI.
Please Note: The IP address is 192.168.0.1 only when you haven’t connected the Treon Gateway to the network using any other means such as an ethernet cable. If the gateway has been connected to the network already beforehand, it may use another IP address.
To find out which IP address your gateway uses, you can utilise an application that shows the TCP/IP values, such as ipconfig for Windows or ifconfig for Linux.
The Treon Gateway uses IPv4 addresses.
In some versions of Windows, when enabling AP Mode and connecting to the Gateway’s Wi-Fi network, the website “http://www.msftconnecttest.com/redirect" will force open in your default browser. This usually only happens the fist time you try to connect and not every time.
Configuration UI
The Treon Gateway Configuration UI gives you access to many network and security settings.

The Configuration UI offers a menu with the following items to choose:
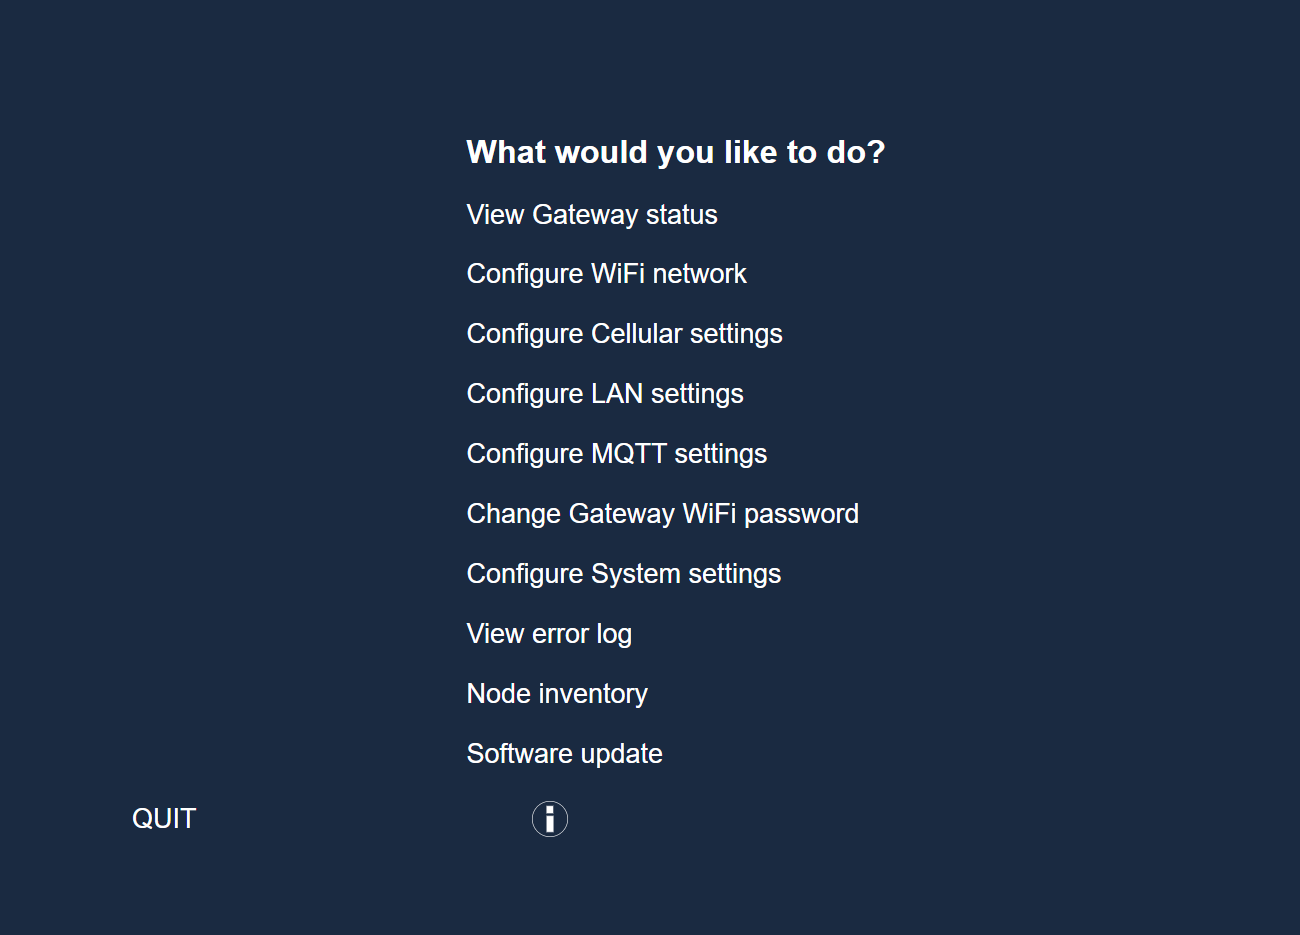
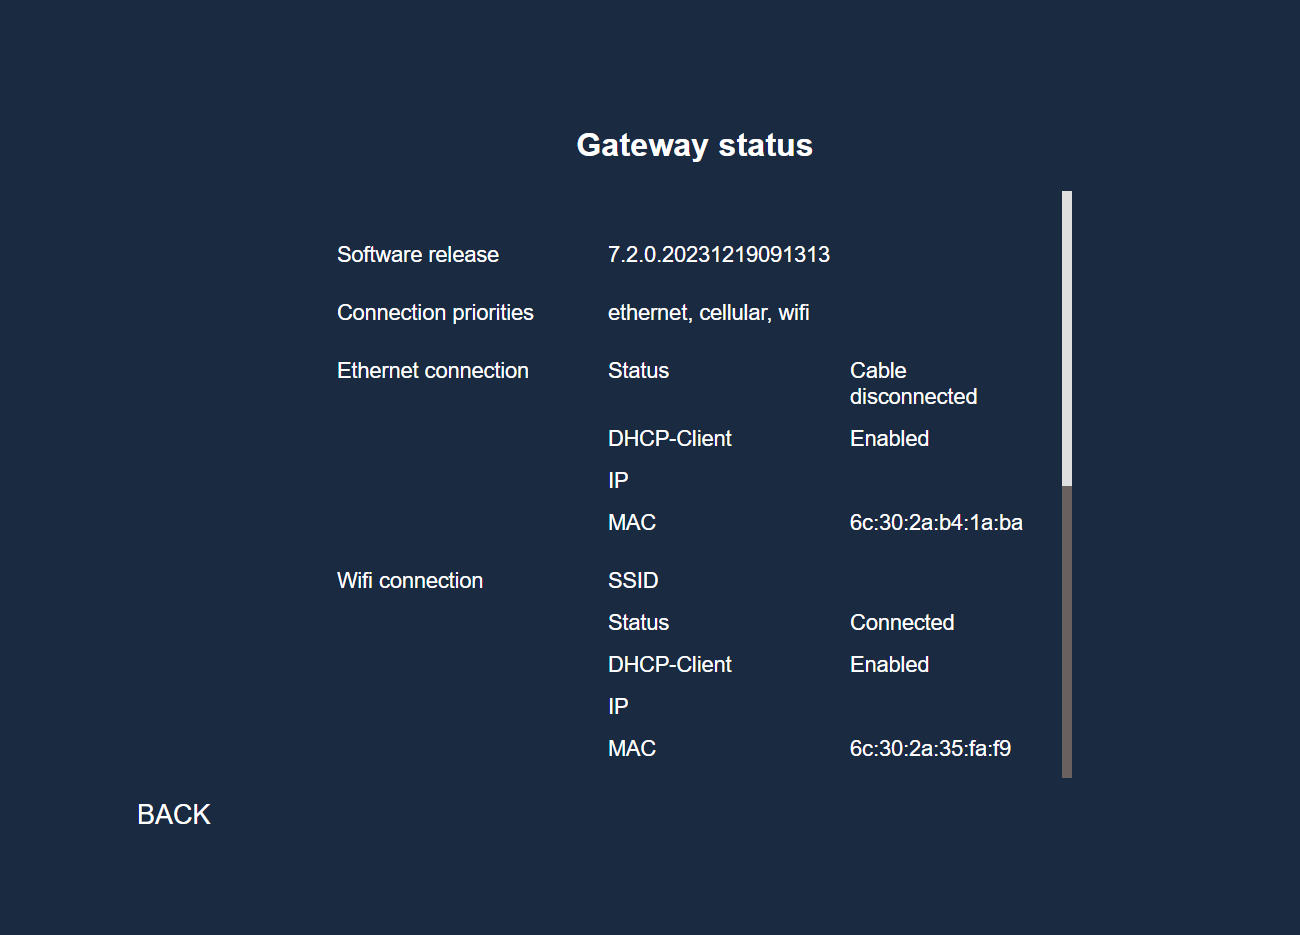
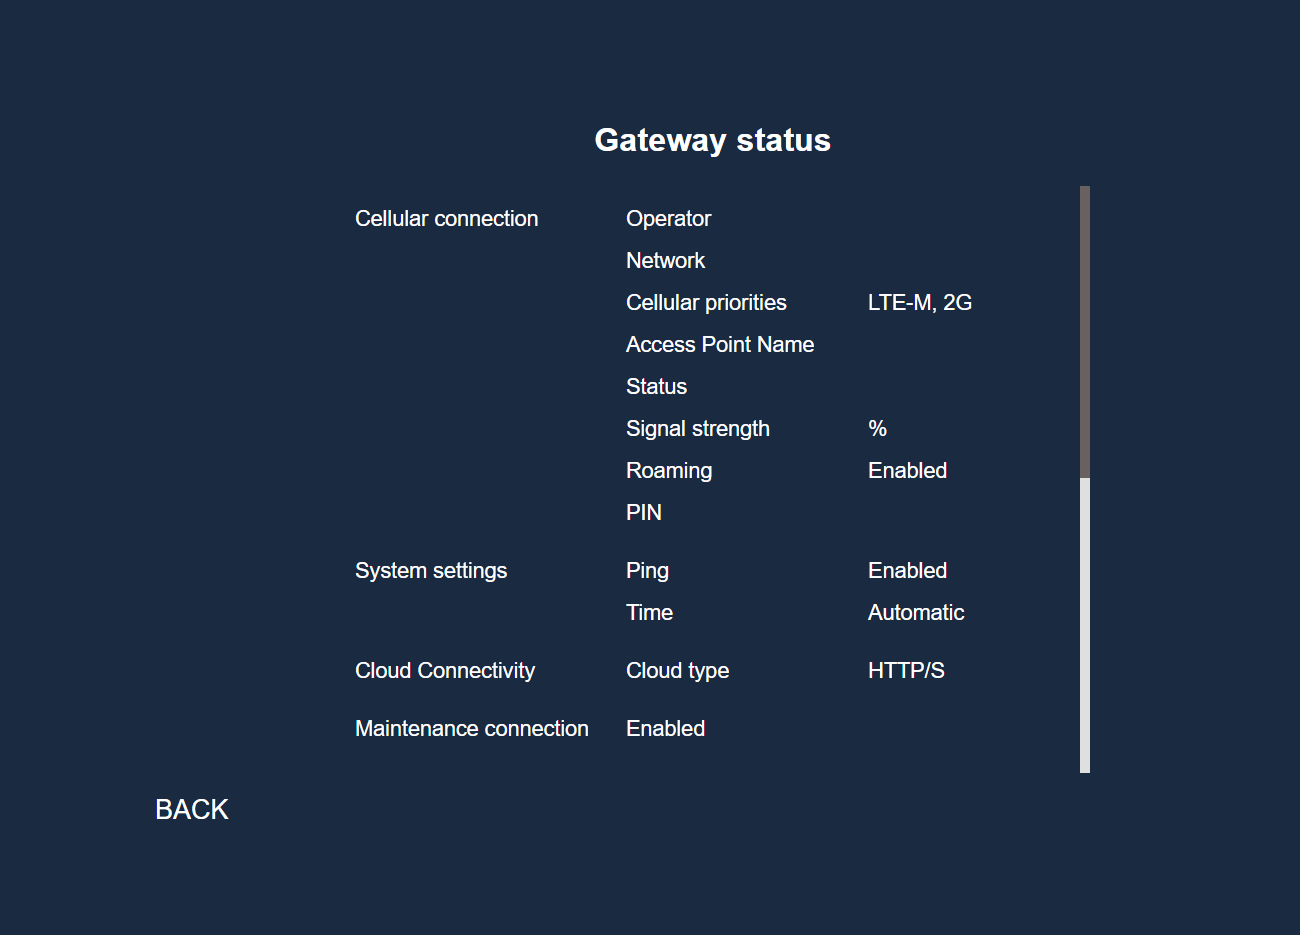
View Gateway Status
Here you can find information on your Treon Gateway, like the current Treon Aito Release for Gateway version, the cellular operator and if the maintenance connection is enabled.
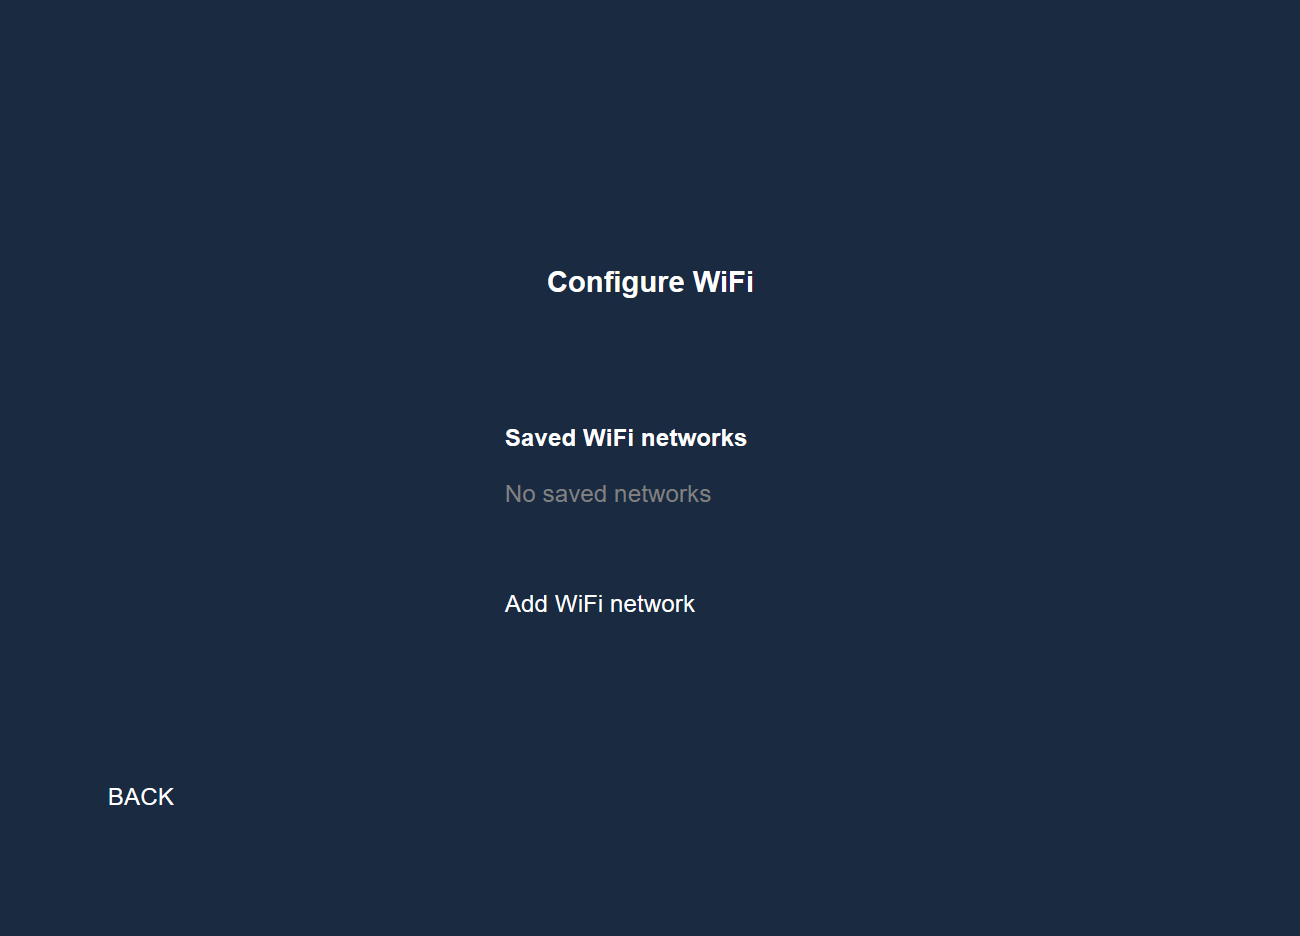
Wi-Fi Settings
This setting is for connecting the Treon Gateway via a Wi-Fi network.
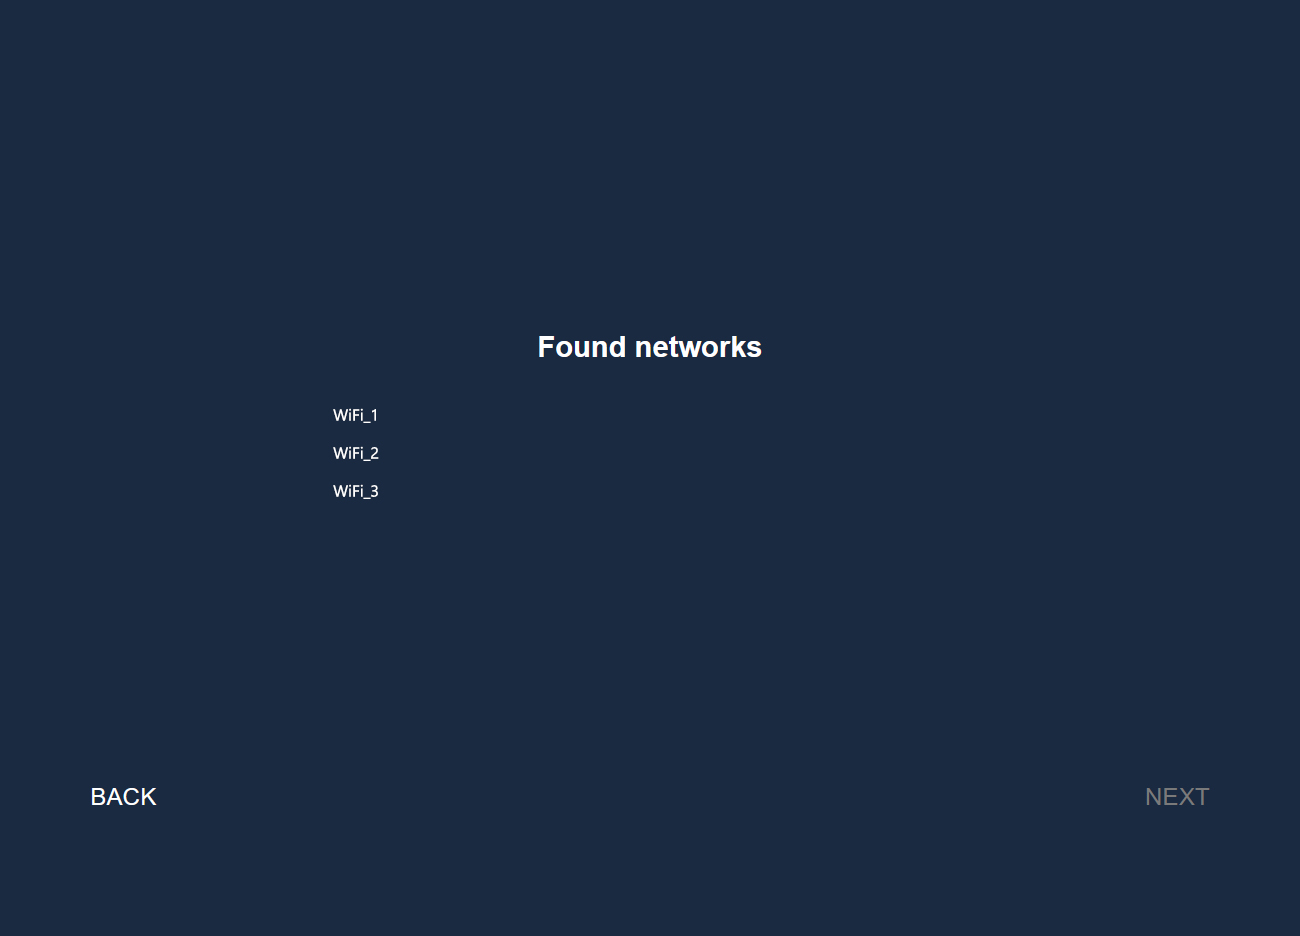
- Choose Add Wifi network and click Next. The Treon Gateway will now search for existing 2.4G networks.
- Select the Wi-Fi network you would like to connect to.
- Enter the password for the selected Wi-Fi network.
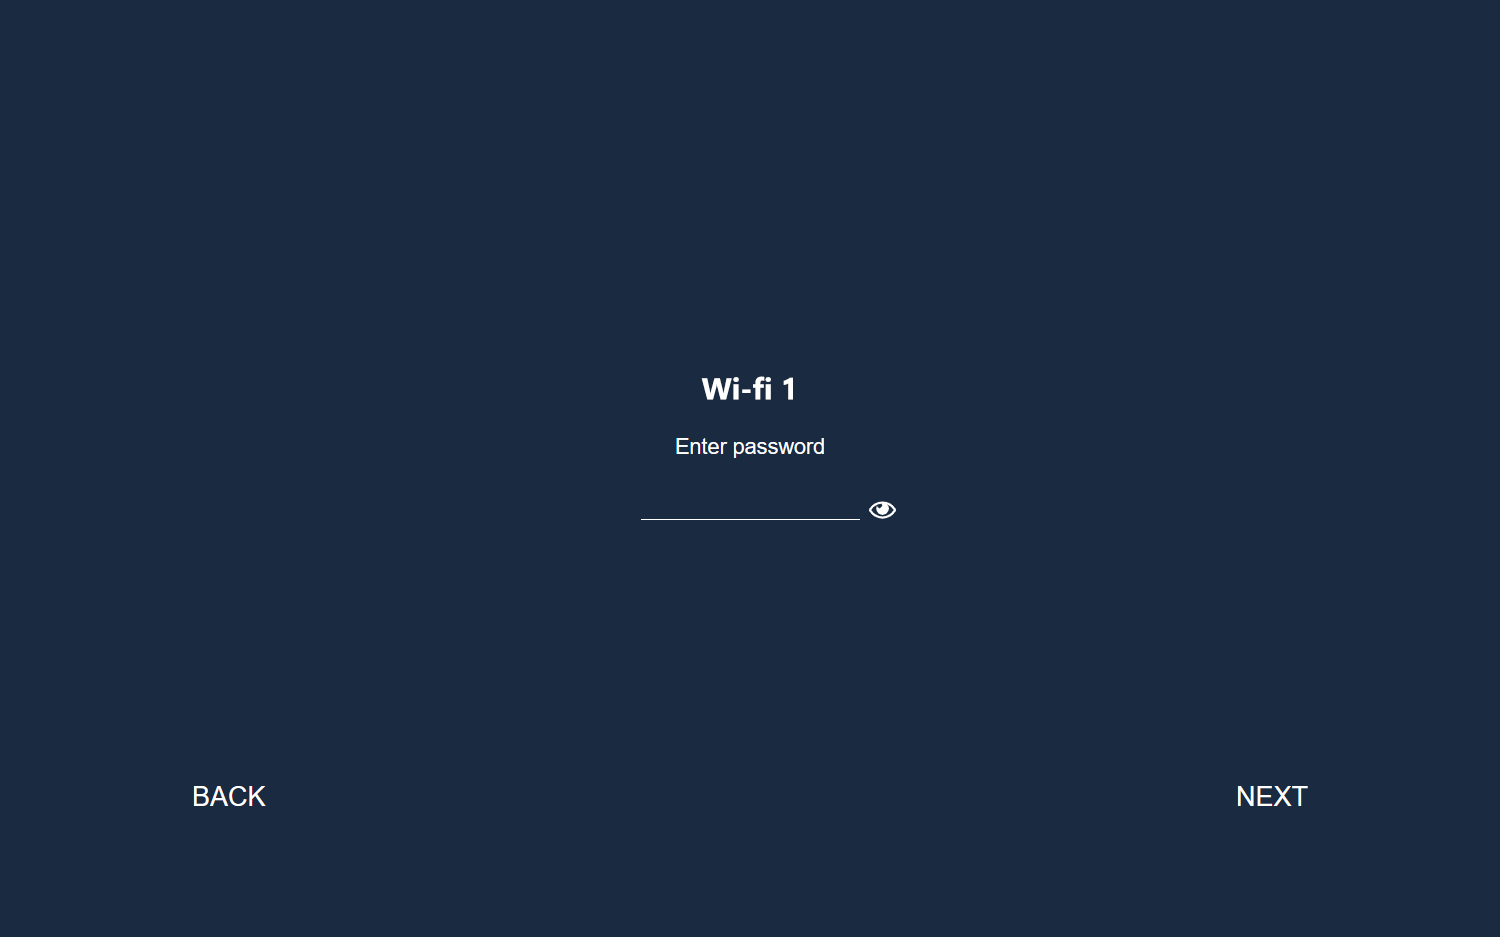
- Now the Treon Gateway will connect automatically to the selected Wi-Fi network.
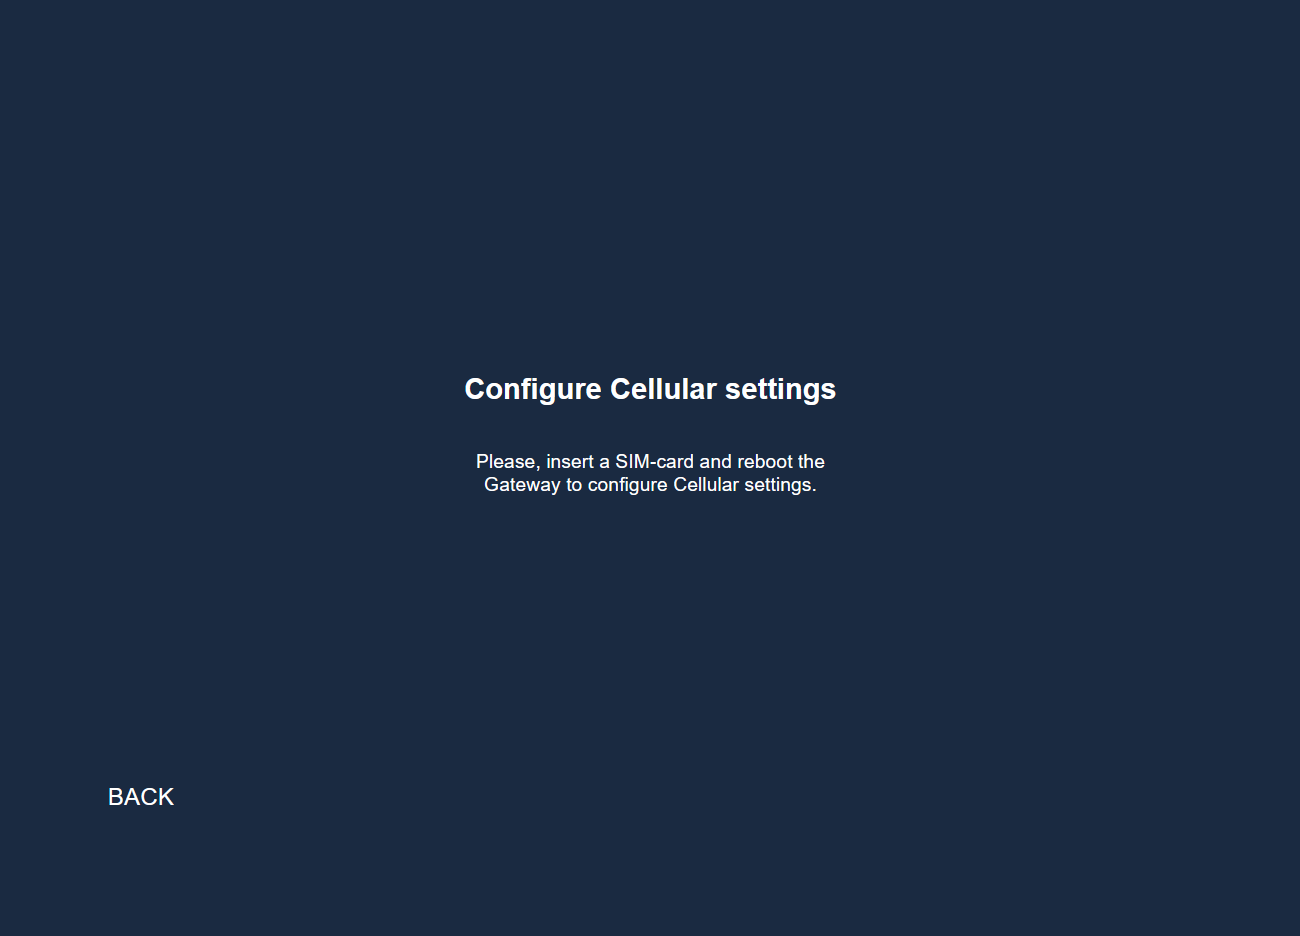
Configure SIM settings
In the SIM settings you can check on the cellular operator, configure the APN, enable roaming and change the cellular profile.
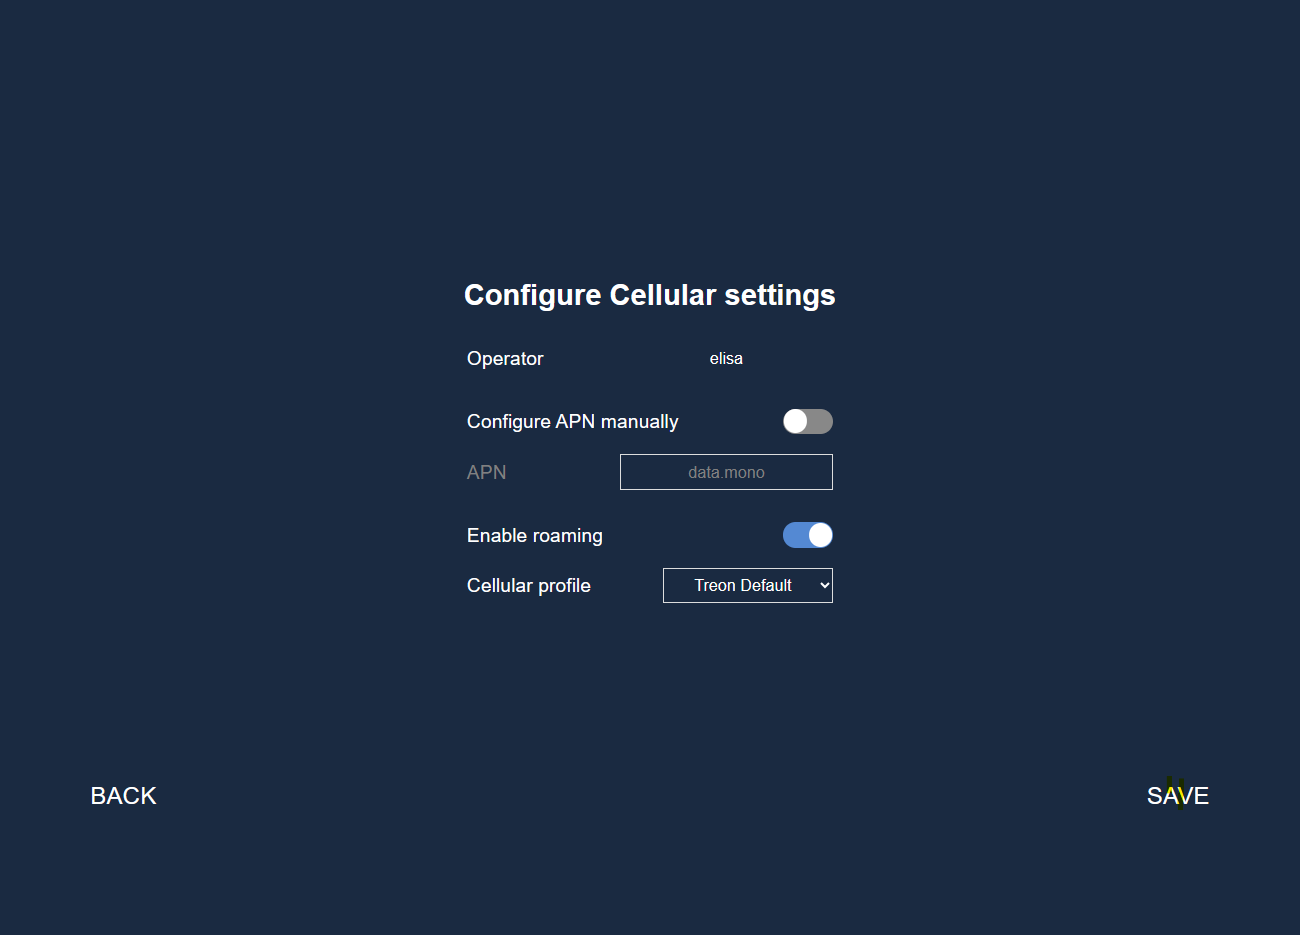
In case the SIM card was not recognized, the gateway will give you this message. Please check that the SIM card is valid for the Treon Gateway and was put properly into the SIM card slot.
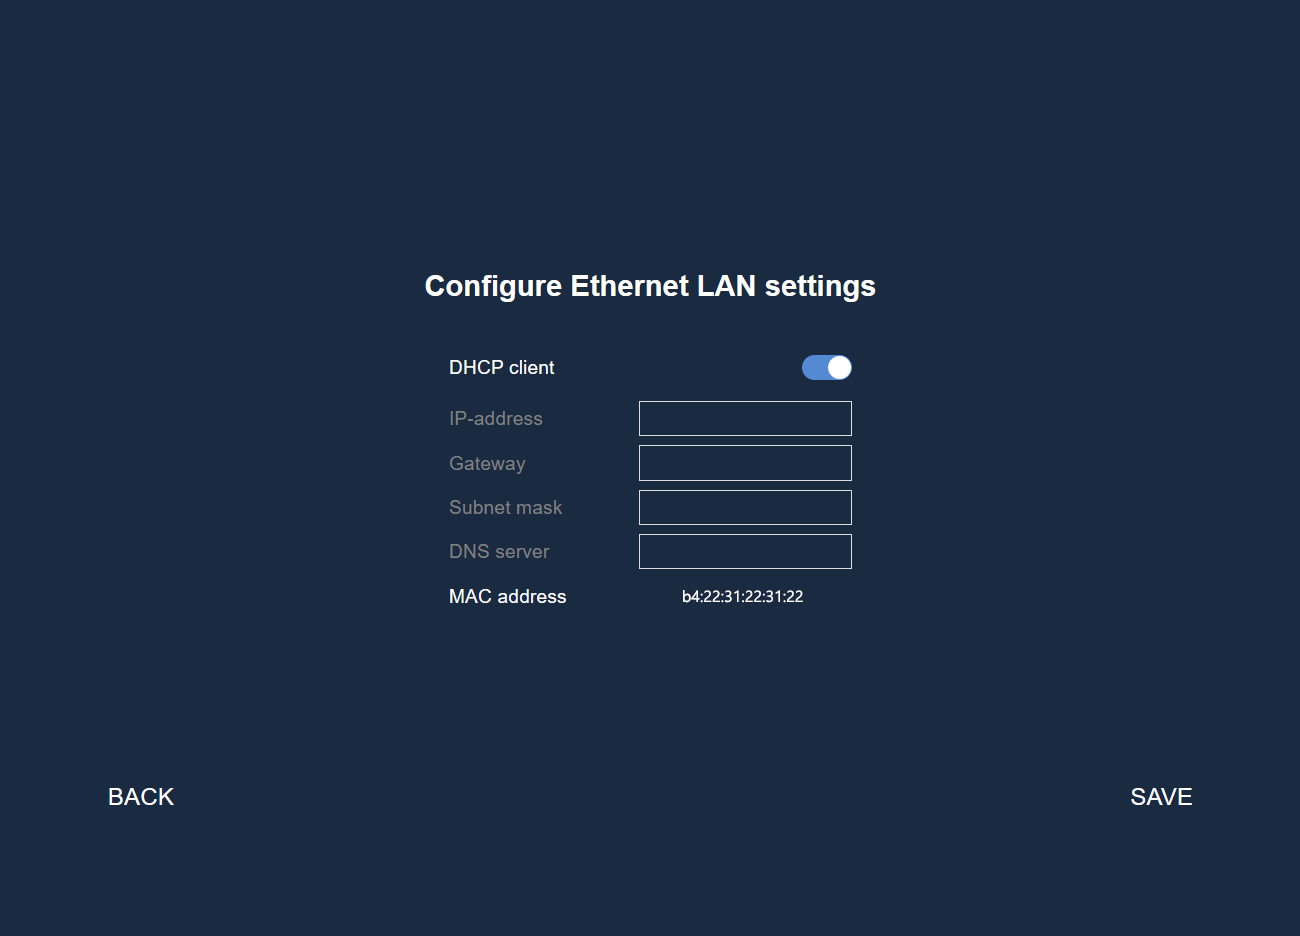
Configure LAN settings
Here you can set the DHCP client, change the ping settings and set the time of the Treon Gateway manually.
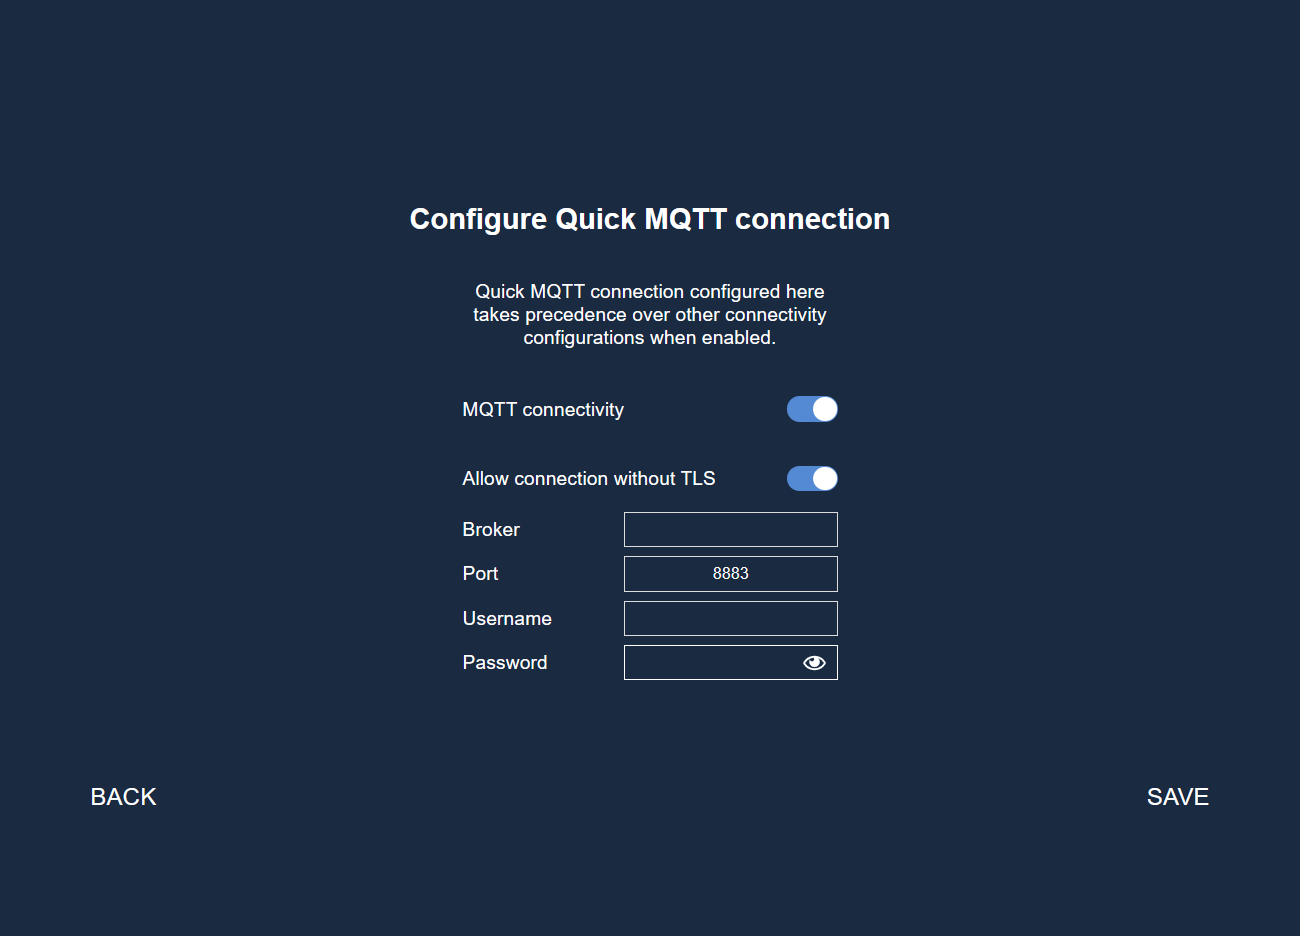
Configure MQTT settings
Here you can change the Treon Gateway’s MQTT settings.
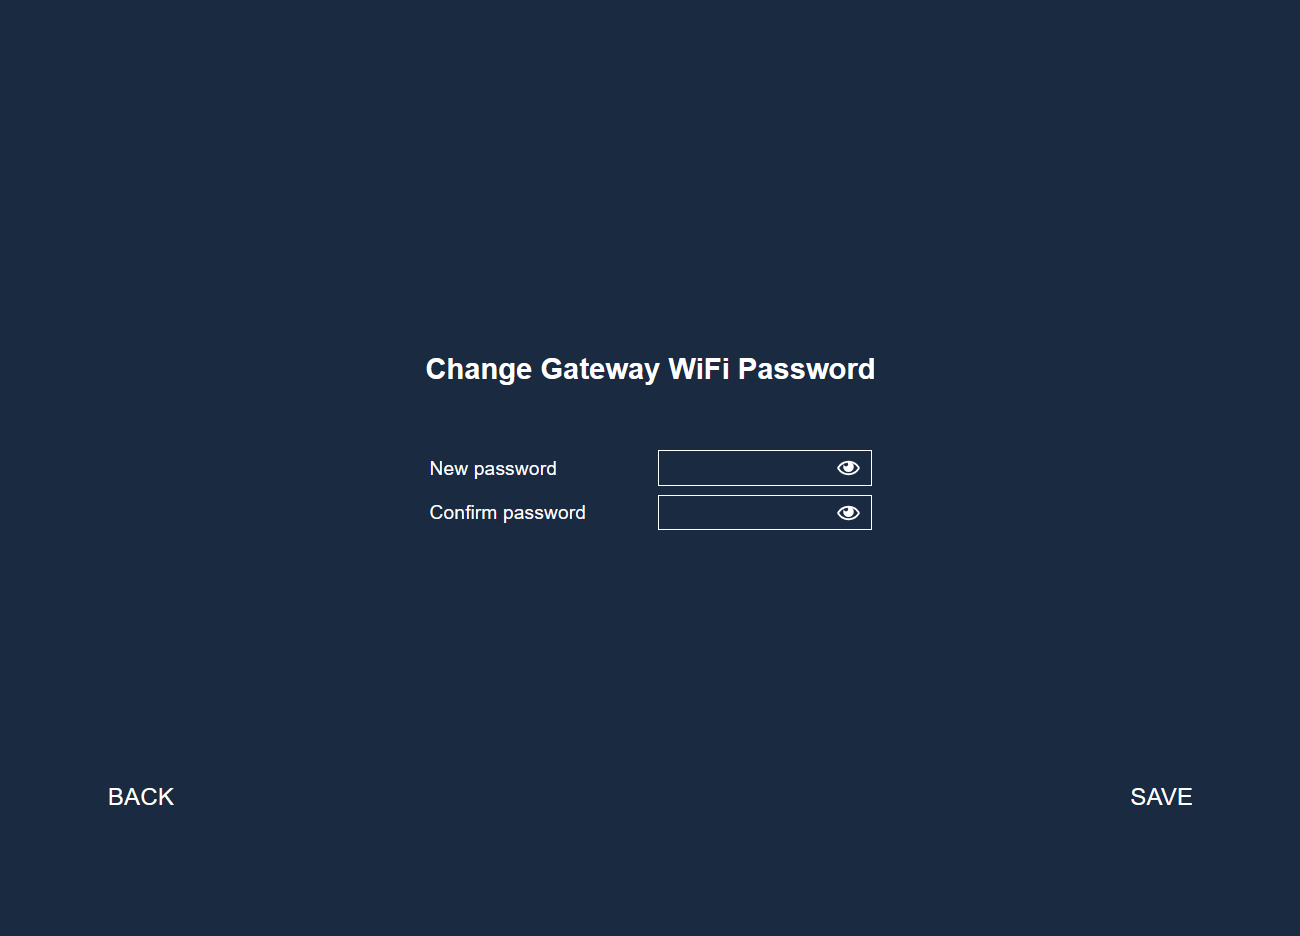
Change Gateway WiFi password
Here you can change the Wi-Fi password of the Treon Gateway. Please make sure to save the new password!
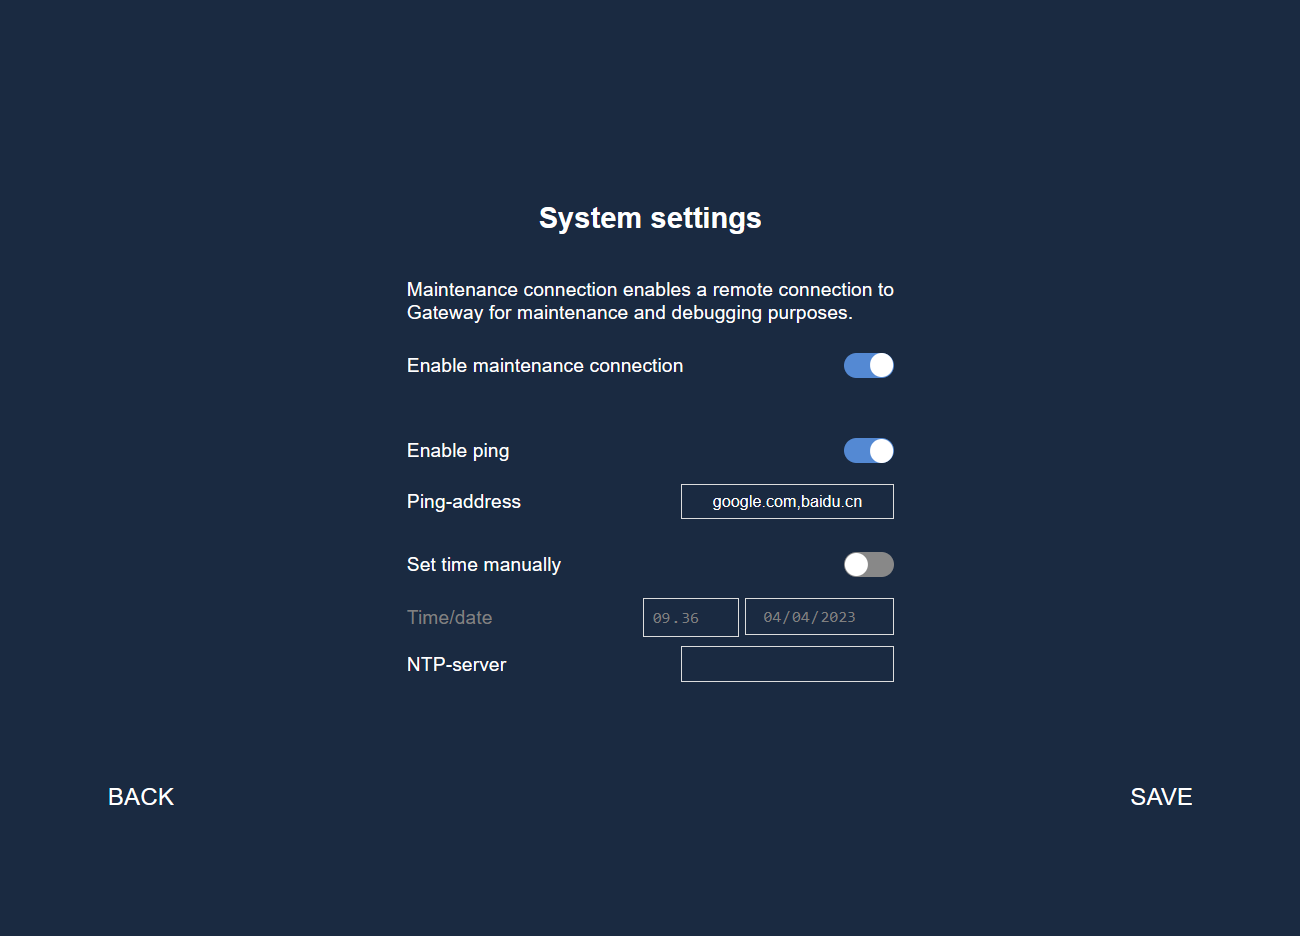
Configure System settings
This menu item lets you enable/disable the maintenance connection of the Treon Gateway, enable/disable the ping, set a ping address and lets you set a time manually.
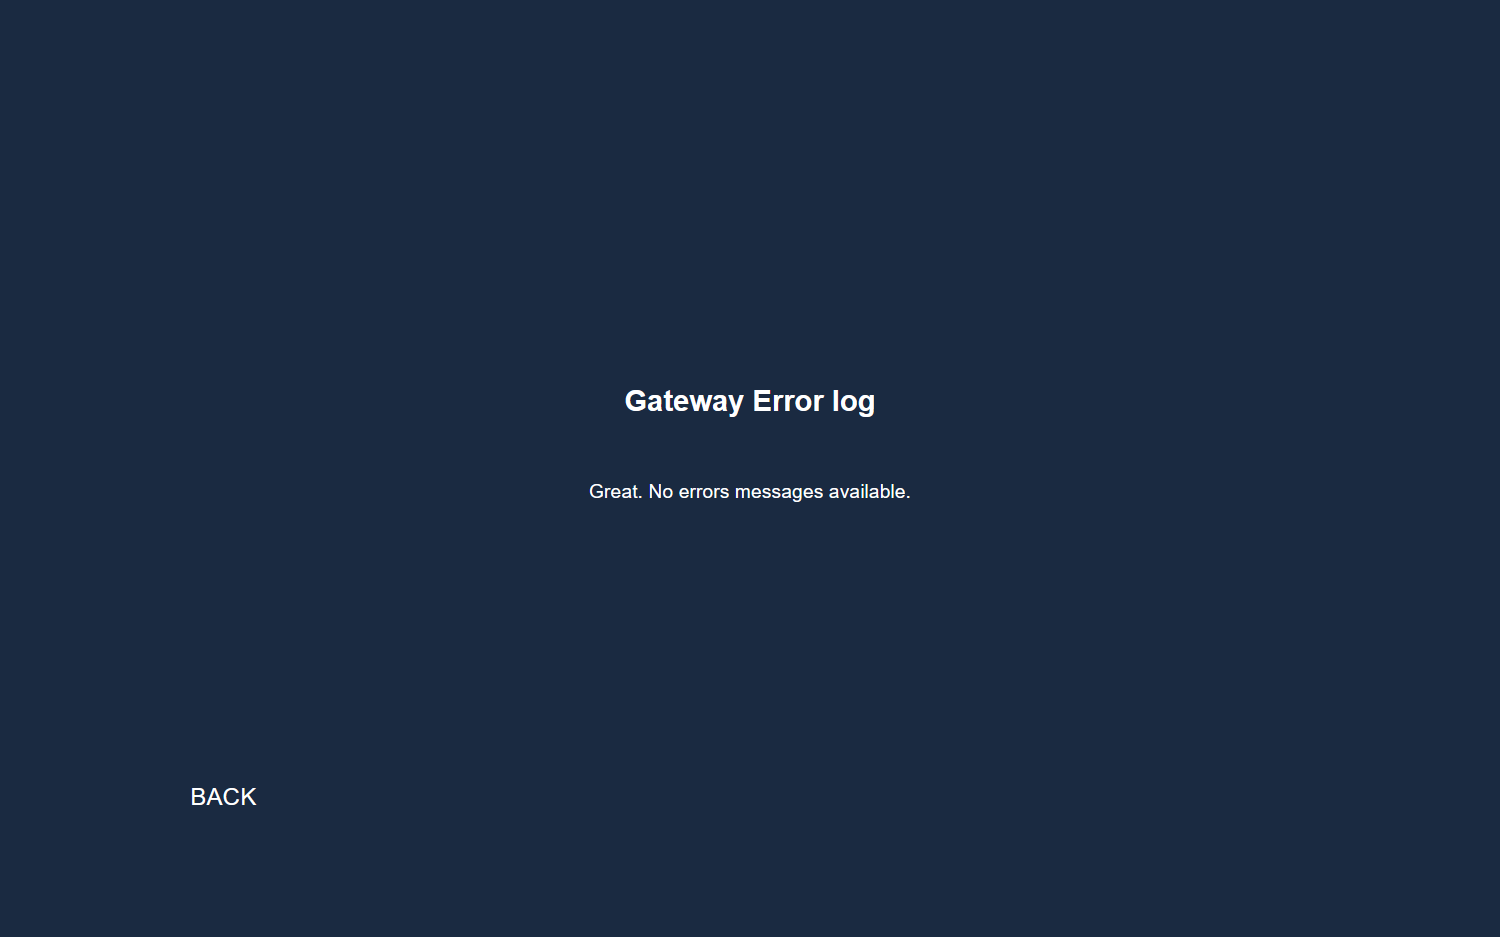
View error log
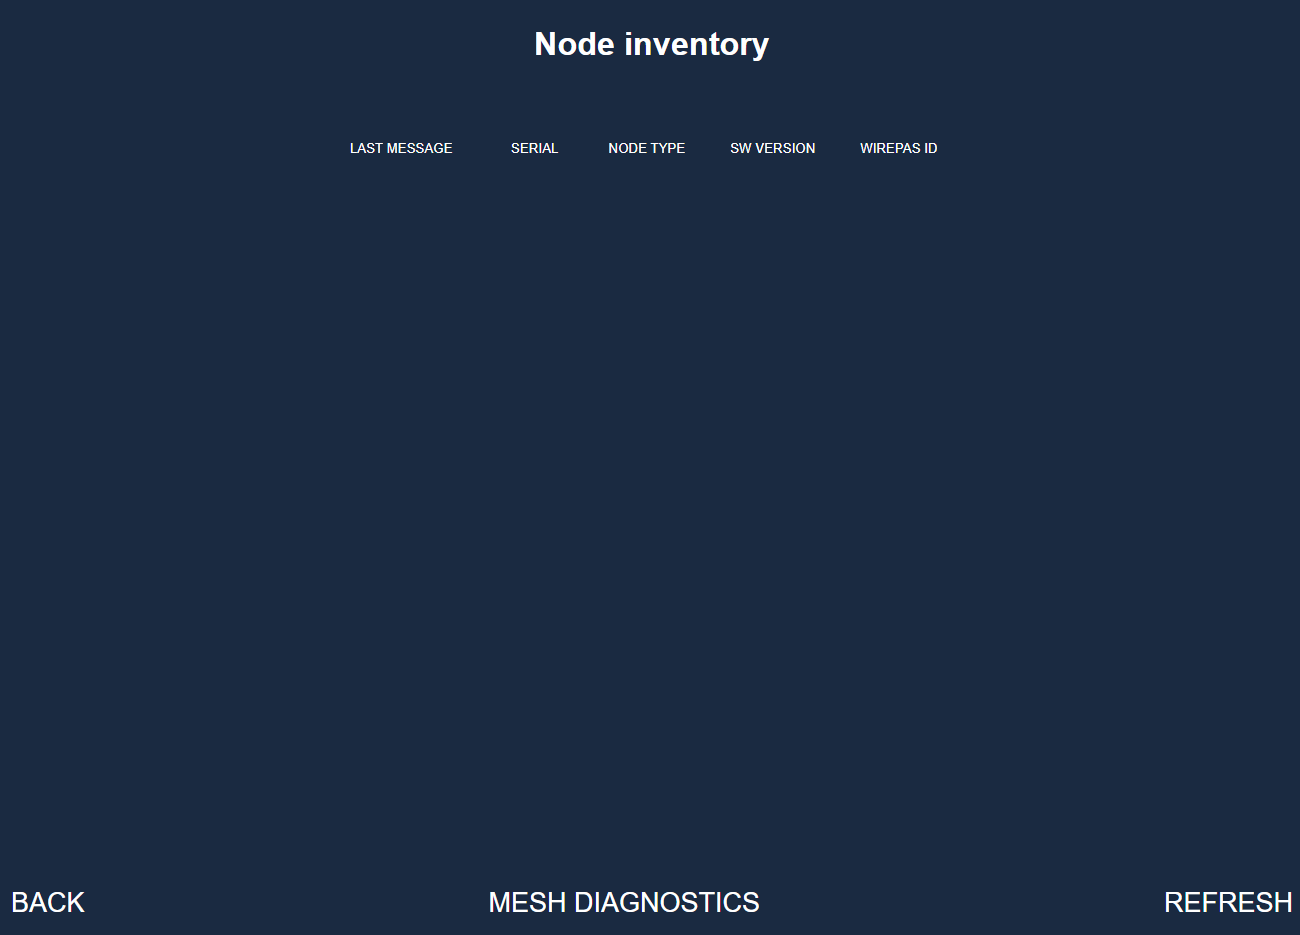
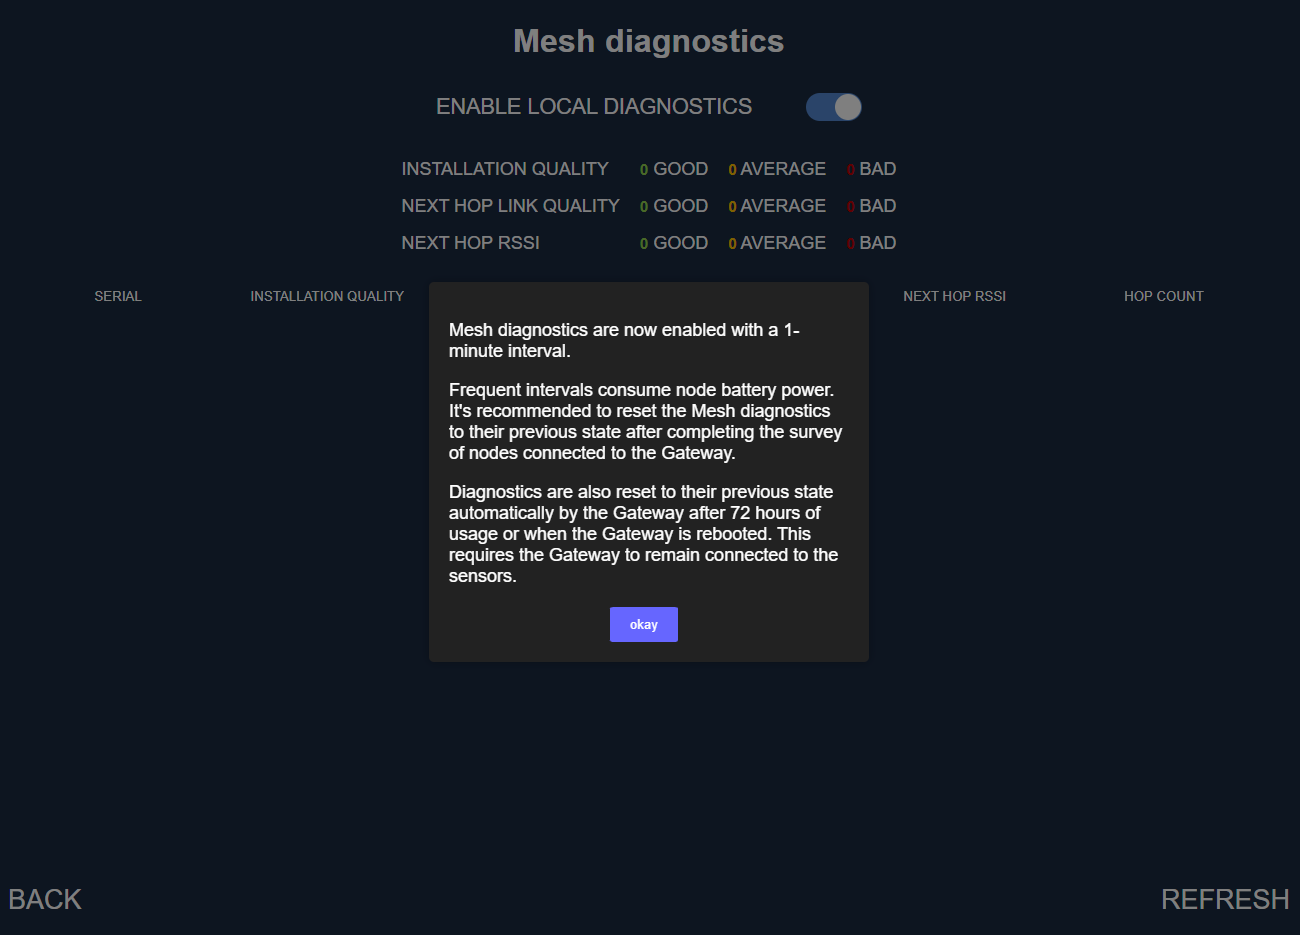
Node inventory
The Node Inventory feature can be accessed from Configuration UI so you can verify what nodes are connected to the Gateway.
- Remember node_inventory can take some time to have up to date information. Also all nodes that have communicated in the past 3h will appear so if the node has been turned off it will remain for some time
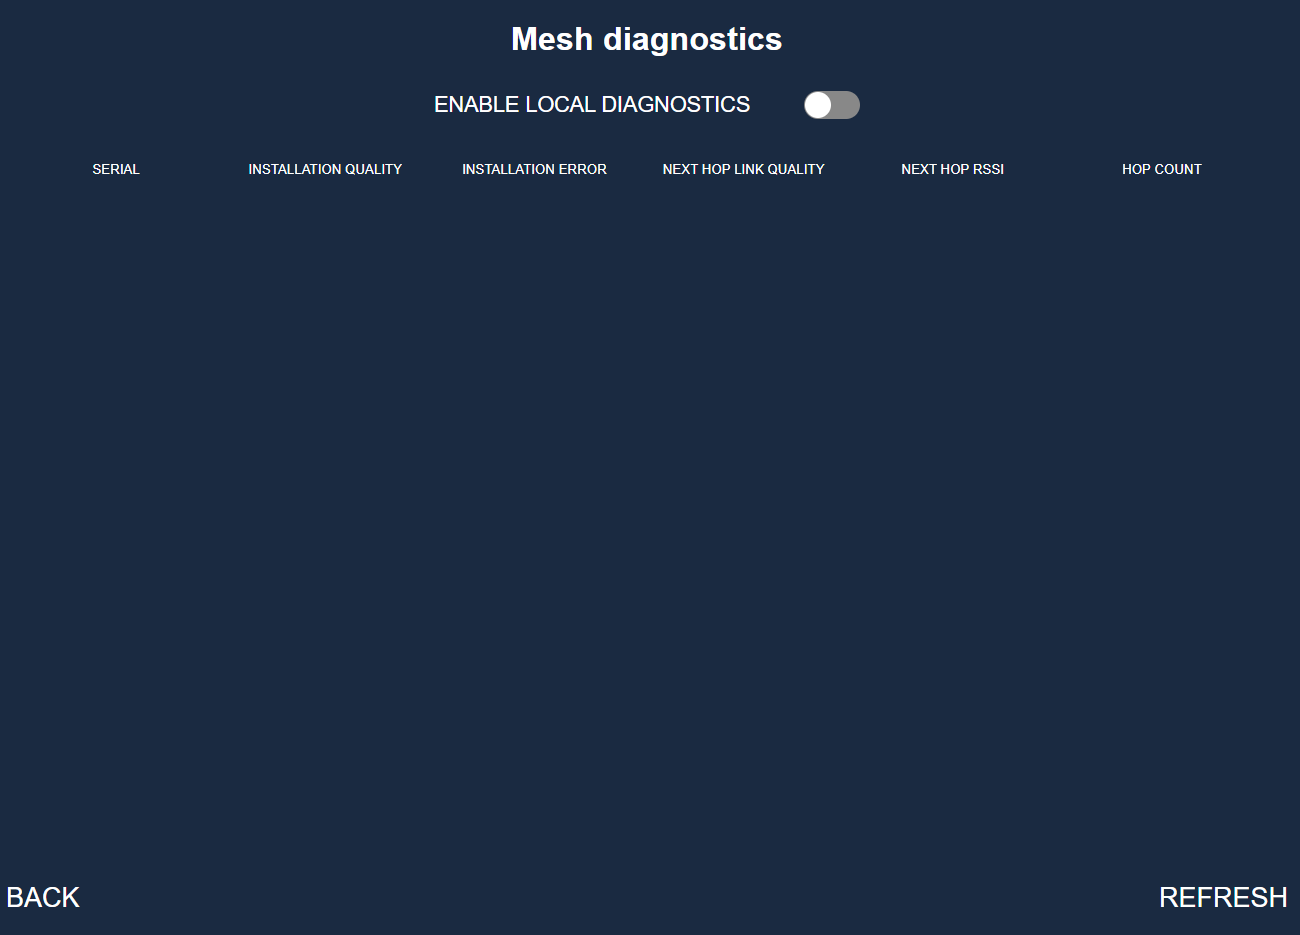
Node telemetry
Node Telemetry now can be configured from Configuration UI.
- Additional known issue when only one line of data exists for a node, UI bug if installation quality is missing it will highlight red.
- Installation Quality and Installation error only available in WP 5.2 or 5.3.
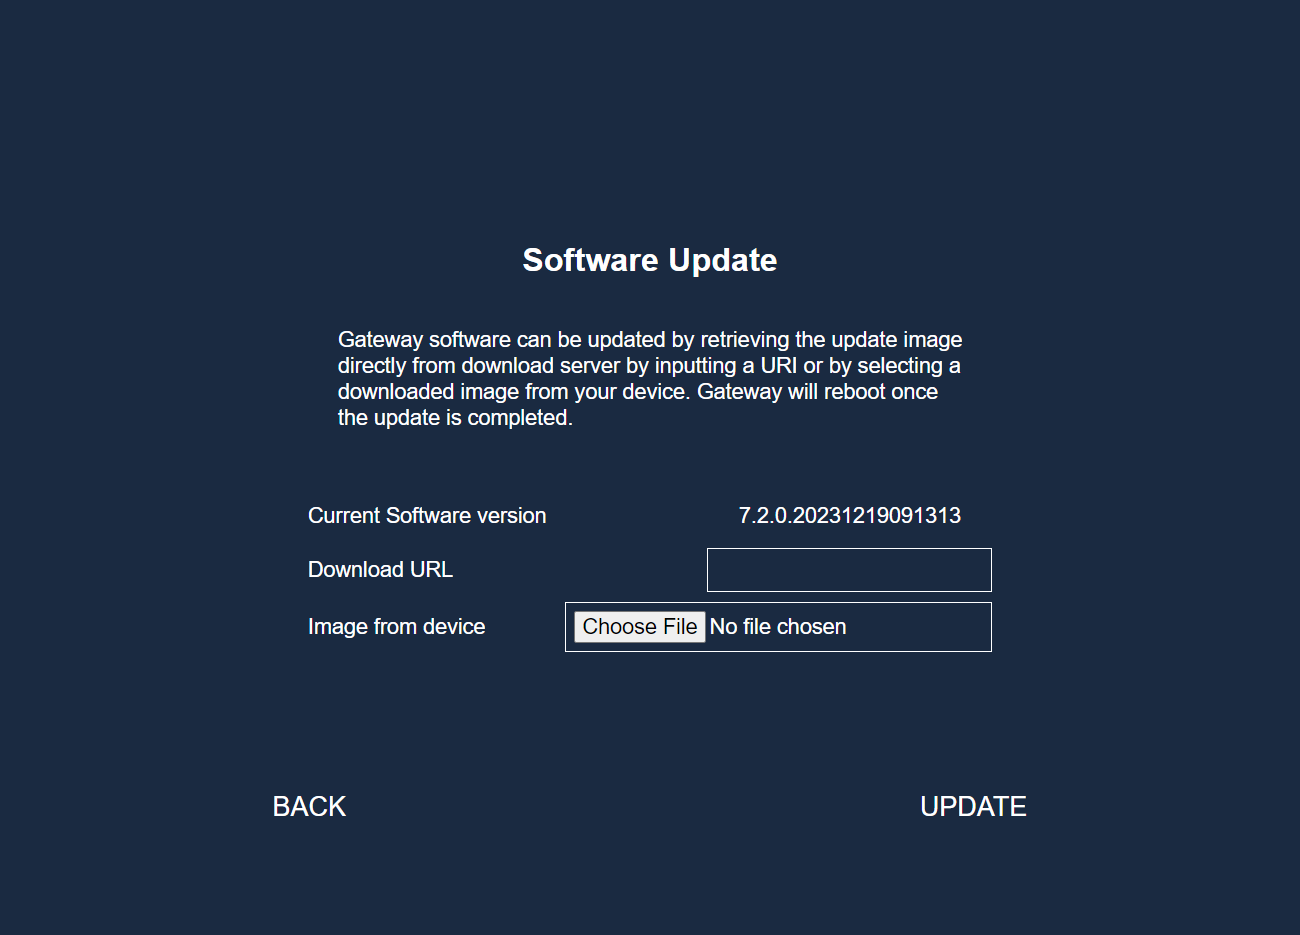
Software update
Now you can update the gateway firmware from the Configuration UI.
- Requires URI or file on the computer accessing Configuration UI.
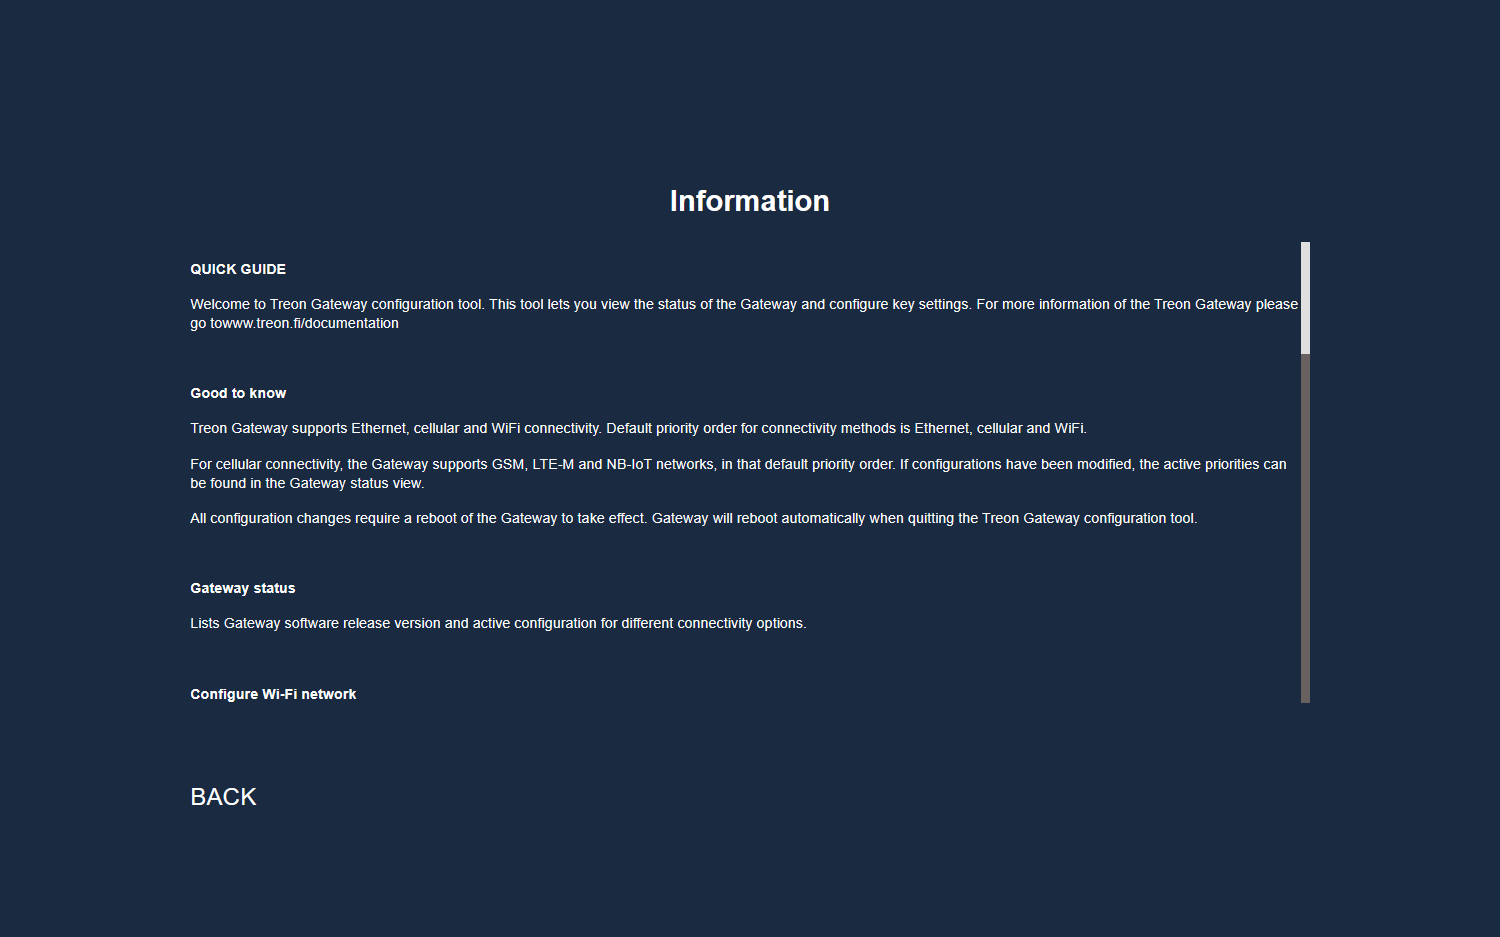
Information
Here you can find information on the Configuration UI settings.
Quit
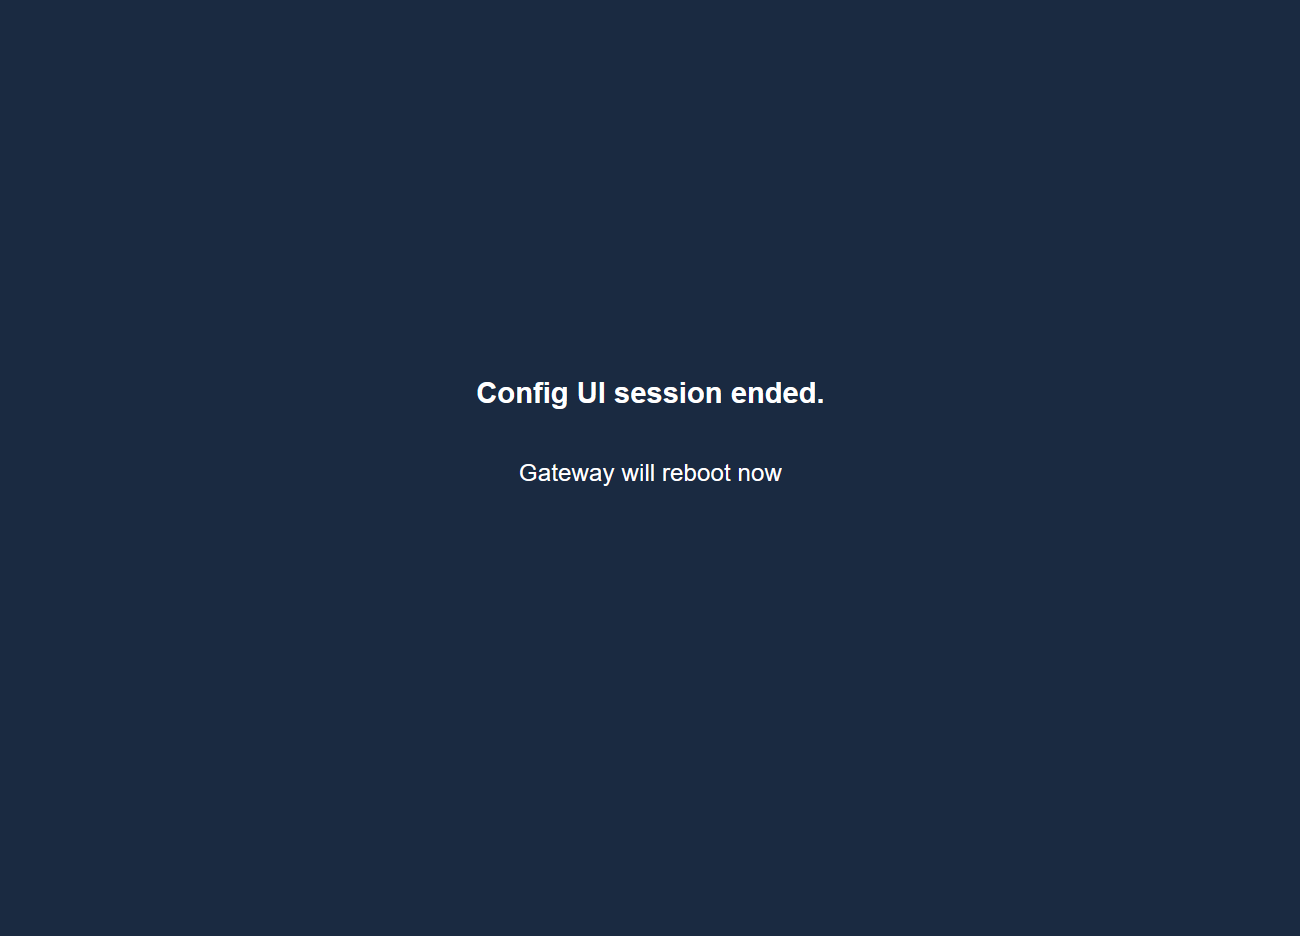
In order to exit the Configuration UI and Access Point Mode, select Quit in the menu, or press and hold the configuration button (F) until the status light stops blinking.

Last updated on Jan 28, 2025