Installation with Treon Magnetic Glue Adapter for Flat Surface
Introduction
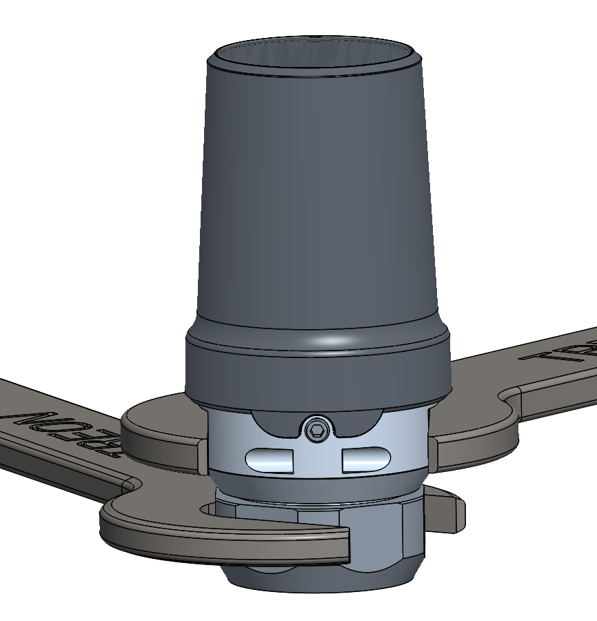
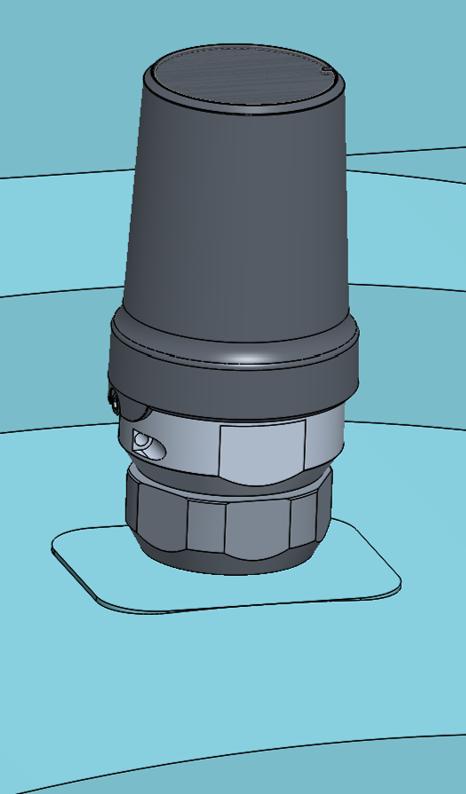
With the Treon Magnetic Glue Mount Adapter for Flat Surface, the Treon Industrial Node X is glued to the equipment while the magnet temporarily holds the sensor in place during adhesive curing. This enables easy positioning and manual orientation prior to final bonding. After curing, the magnet is not responsible for holding the sensor in operation.
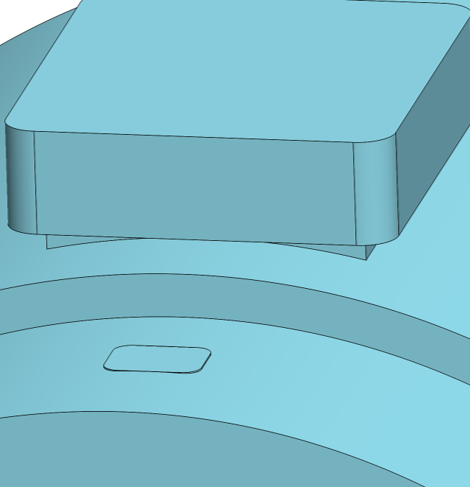
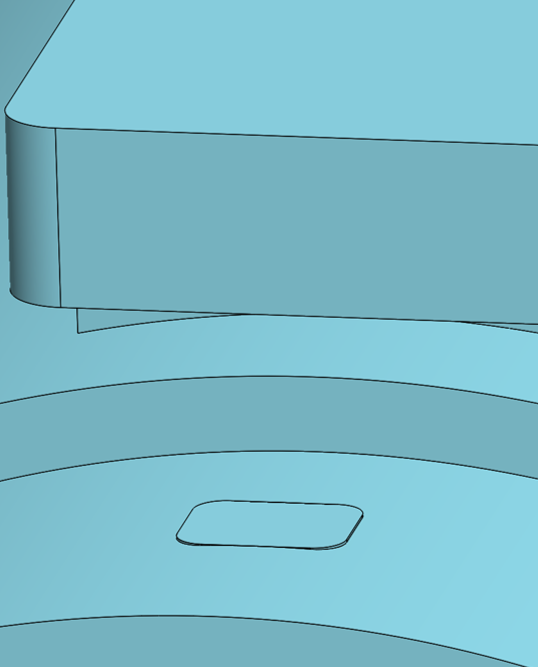
This installation method requires a flat, smooth surface with a minimum diameter of 31.7 mm (1.24 in). Magnetic adapters should not be used when measuring magnetic fields, as the magnet may interfere with the readings. Magnets are intended only as temporary support during installation.
Applies to: Treon Industrial Node X
Adapter: Treon Magnetic Glue Mount Adapter for Flat Surface
Use when: You need manual orientation and easy placement on a flat surface without drilling.
Specifications
| Parameter | Value |
|---|---|
| Bonding | Glue |
| Minimum mounting surface diameter | 31.7 mm (1.24 in) |
| Minimum thread hole depth | – |
| Total height (Node + adapter) | 89 mm (3.50 in) |
| Curved surface | No |
| Uneven surface | No |
| Allows manual orientation | Yes |
| Frequency response (vibration) | Good |
| Temperature response (steady‑state) | Medium |
| Fast temperature change response | Medium |
| Affects magnetometer measurements | Yes |
Requirements
For this installation method you will need:
- Treon Industrial Node X.
- Treon Magnetic Glue Mount Adapter for Flat Surface.
- Flat mounting surface of at least 31.7 mm (1.24 in) diameter.
- Industrial‑grade glue or epoxy suitable for metal bonding.
- Cleaning materials (degreaser/isopropyl alcohol, lint‑free wipes).
- Personal protective equipment (PPE) as per site rules.
Note: Magnets only hold the adapter during curing—final fixation depends on glue.
Step-by-step installation guide
Step 1: Clean the surface
Clean the mounting surface on the asset thoroughly.
Step 2: Attach adapter to node
Take the Treon Magnetic Glue Mount Adapter for Flat Surface, place it on the Treon Industrial Node X. Carefully screw the adapter on to the node.
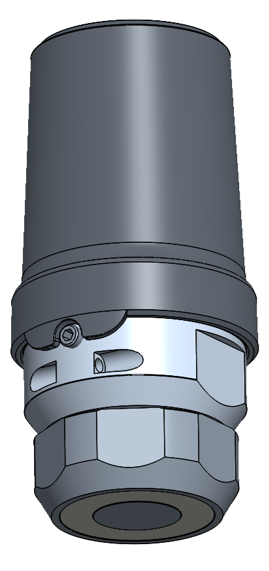
Tighten the connection with a spanner size 34 mm and a torque wrench to 20 Nm.
Step 3: Apply glue to surface
Choose an appropriate glue like the Loctite HY 4090. Follow closely the instructions that come with the glue!
Apply the glue to the mounting area on the asset. The mounting area needs to be a minumum of 31.7 mm (1.24 in) in diameter.
Step 4: Place node on asset
Place the Treon Industrial Node X in the desired orientation on the area where you applied the glue. Make sure the magnet holds the node in place to secure the glue adhesion. Wait for the glue to dry.
Verification
- Confirm axis alignment marks match the intended directions.
- Run a quick measurement and validate expected directional sensitivity.
The Treon Industrial Node X is now fully installed!
Troubleshooting
Error: The surface has paint.
Consider removing the paint if found safe after consulting the machine's operating and maintenance documentation. In some cases, attaching the node to loose paint might lead to it falling off. You can achieve the best measurement results through a tight connection to the machine body.Error: The asset cannot be turned off.
In case the asset cannot be turned off for installation of the Treon Industrial Node X, please proceed with caution and take all safety protocols at the deployment site into account.Error: Glue does not dry or hold.
Choose an appropriate glue such as the Loctite HY 4090 and follow closely the instructions that come with the glue.Error: The asset was damaged.
If at any point it seems like the asset was damaged during the installation process, please consult the machine's repair manual or contact the manufacturer for further instructions on how to conduct the repair.Disclaimer
Treon is not responsible for any damage, injury, or malfunction resulting from the installation or use of the Treon Industrial Node X.
Installation must be performed by qualified personnel.
Any issues arising from incorrect installation, improper handling, or use outside the specified guidelines are the sole responsibility of the installer or end user.

Last updated on May 7, 2026